
|Articles|September 1, 2016
- LCGC North America-09-01-2016
- Volume 34
- Issue 9
What HPLC Operators Need to Know, Part II: Instrument and Detector Settings
Author(s)Dawn Wallace Watson
A practical step-by-step guide to setting up an HPLC instrument with hints and tips to avoid common pitfalls.
Advertisement
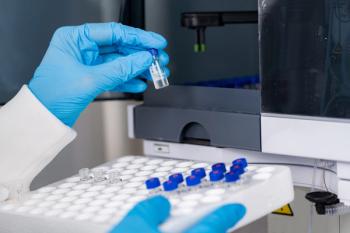
Here we offer a practical step-by-step guide to setting up a high performance liquid chromatography (HPLC) instrument with hints and tips to avoid common pitfalls.
Prepare Mobile-Phase Solvents
Do not measure the pH of the mobile phase after the organic solvent has been added because pH meters are calibrated to give the correct pH reading in aqueous solution. Buffer components should not be added to the organic solvent because mixing aqueous buffer into the organic phase carries a high risk of the buffer being precipitated. Ensure you are using the correct pH modifying acid or base for your buffer-for example, sodium phosphate buffers should be adjusted with only phosphoric acid or sodium hydroxide.
Although pumps are very efficient it may not be best to use them to mix gradients from 0%; instead premix A and B to a single solution that runs at 100% on line A-this will reduce variability between HPLC instruments. Do not fill lines with organic solvent without checking what was in there before. If the previous method used buffer in line B and your method uses organic in line B, there is a good chance you will precipitate buffer in your pump tubing or pump head. If in doubt, flush it out (use 80:20 water–organic, or isopropanol as a cosolvent when switching between reversed-phase and normal-phase modes because it is miscible with all solvents).
Sonication is the least effective method of degassing and can cause loss of the organic portion because of heating. Vacuum filtering the mobile phase is better because it degasses and filters in a single step.
Prime the Solvent Channel Lines and Pump
Set the mobile-phase composition and flow rate as specified in the method.
Flush the System
Flush the system without the column in place, checking for leaks. The degassed mobile-phase solvents should be used to flush the tubing to remove previous solvents or air from the system. The void volume of the system should be accounted for, including the reservoir tubing, which could have volumes as high as 5 mL. Flow rates up to 10 mL/min can be used.
Stop the Flow and Install Column
Flush the system with the column in place for 5 min, again checking for leaks (use the flow rate specified by the method). When a column is connected for the first time, or after it has been stored for a long time, it needs to be washed to remove the storage solvent and wet the stationary phase. At this stage, it is recommended that the column is not connected to the detector, instead let the solvent flow to waste for 5 min to ensure any particulate material or air is removed.
Equilibrate the System
Equilibrate the system for 10 min, monitoring system back pressure to ensure that it is stable. If applicable, purge the autosampler and reequilibrate for 10 min.
Set the Method Conditions
Set the method conditions including mobile phase composition and required detector settings (here we will consider UV–visible diode-array detectors). The detector baseline can serve as an indication of problems with the column, solvents, or pumps-if the column is contaminated, the solvents are not appropriate, or there is air in the pump head, the baseline will not be stable. The selected wavelength should be suitable for the analytes-for example, the wavelength range for aromatic compounds with polar functional groups is 240–260 nm. A browser wavelength can be used to detect all peaks (such as 250 nm with 100 nm bandwidth). For increased selectivity use a specific wavelength and narrower bandwidth for sample and reference wavelengths. For samples with high concentrations use a peak or valley in the spectrum as the sample wavelength to give the optimum linearity. Using wavelengths in the range 210–220 nm can cause problems with detection because of absorption of the mobile phase. A reference wavelength should be set where analytes show little or no absorbance and a broad bandwidth should be used (this should not obscure analyte peaks because it will affect quantitation).
Set the slit width to 4 nm for normal applications. Use a narrow slit (1 or 2 nm) for the identification of analytes with fine spectral structure or high concentrations. To detect very low concentration analytes use a wide slit (such as 16 nm). To properly detect peaks, set the response time to one-third of the peak width at half height of the narrowest peak of interest-for example, for a 0.02-min peak, set a 0.5-s response time. Peaks should ideally be defined by at least 20 data points. If peaks are coeluted or the signal-to-noise ratio is low, 40 data points per peak should be used. Lower data collection rates can be used for wide peaks, and conversely, faster data collection rates can be used for peaks that are less than a few seconds wide.
Run System Suitability Samples
System suitability samples confirm that the HPLC system is “fit for the purpose intended.” System suitability parameters include resolution, repeatability, column efficiency, and tailing factor. Values for these parameters should represent the minimum acceptable system performance limits.
Get the full tutorial at
Articles in this issue
almost 10 years ago
How Does It Work? Part V: Fluorescence Detectorsalmost 10 years ago
Highlights from HPLC 2016almost 10 years ago
Vol 34 No 9 LCGC North America September 2016 Regular Issue PDFAdvertisement
Related Content
Advertisement


Advertisement
Advertisement